

Traffic Light Simulator in Angular
Building and deploying a traffic light simulator in Angular


Building a traffic light simulator in Angular
Context
While procrastinating on YouTube today, I came across this short video of a traffic light simulator in React. It was then that I had an idea: why not embark on a series of articles where I construct these delightful, small-scale projects, purely for the joy of it? And so, let's dive right in.
Prerequisites
Before getting started, let's check if we have Angular CLI, Node and npm installed on our machine using the command: ng v.
It should show the version of NodeJS, npm and Angular CLI installed on our machine.
We will also need docker to containerize our application, which can be checked using the following command: docker --version.
Check the following links to install these if they are missing:
- NodeJS and npm: Node.js is an open-source, cross-platform JavaScript runtime environment. Acronym for
Node Package Manager, npm is typically used to install libraries, frameworks, and tools that are required for developing JavaScript applications. - Angular: Angular is an open-source front-end web application framework for building dynamic, single-page web applications (SPAs).
- Docker: Software and tools for building and running application in containers. Containers are lightweight, standalone, and executable packages that contain everything needed to run a piece of software, including the code, runtime, system tools, libraries, and settings.
Getting Started
Now that we have the prerequisites, let's get started using ng new which interactively generates an Angular project scaffolding for us. ng serve --open builds and runs this project locally for us and serves the page in our browser client.
We can then remove the common code from app.component.html file as we do not it, and create the html frame for our traffic light:
<div class="parent">
<div>Traffic Light Simulator</div>
<div class="traffic-light">
    <div class="circle"></div>
    <div class="circle"></div>
    <div class="circle"></div>
  </div>
</div>
Let's also add some basic CSS to our app.component.sass to improve the look and feel of our traffic light:
.parent
    display: flex
    flex-direction: column
    justify-content: center
    align-items: center
    height: 90vh
    width: 99vw
    font-size: 2em

.traffic-light
    height: 90%
    width: 15%
    align-items: center
    display: flex
    flex-direction: column
    background: black

.circle
    width: 95%
    height: 30%
    border-radius: 50%
    margin: 4%

.grey
    background: grey

.red
    background: red

.yellow
    background: yellow

.green
    background: green
Note that I am using sass preprocessor selected while setting up the project. css, scss, less and stylus are the other options available. Read more about css preprocessors and Angular css preprocessor options here and here.
Using TypeScript and ngClass for a functional traffic light
Now that we have the basic structure ready, let's write some code. We will be using the ngClass Angular directive alongside some TypeScript in our app.component.ts file to get our traffic light to work.
- Directives in Angular: Angular directives are a way to extend and enhance the functionality of HTML elements in Angular templates. Directives are responsible for adding behavior, manipulating the DOM (Document Object Model), and controlling how components and templates behave. Angular provides several built-in directives, and also provides options to create custom directives.We will be using one such builtin directive, the
ngClassdirective. - ngClass:
ngClassis a built-in Angular directive that allows us to dynamically add or remove CSS classes to an HTML element based on certain conditions. This is what ourapp.component.htmlwill look like after addingngClassdirectives:
<div class="parent">
<div>Traffic Light Simulator</div>
<div class="traffic-light">
    <div class="circle" [ngClass]="red && !yellow && !green ? 'red' : 'grey'"></div>
    <div class="circle" [ngClass]="!red && yellow && !green ? 'yellow' : 'grey'"></div>
    <div class="circle" [ngClass]="!red && !yellow && green ? 'green' : 'grey'"></div>
  </div>
</div>
Here, we are using ngClass directive to use red, yellow, green or grey css classes on circles based on the component properties red, yellow and green.
Let's add these properties to our AppComponent class in app.component.ts:
red = true;
yellow = false;
green = false;
Next, let's write a trafficSignal function that changes the color of traffic lights at set intervals:
  trafficSignal() {
    const turnOnRed = () => {
      this.red = true;
      this.yellow = false;
      setTimeout(turnOnYellow, 6500); // Red for 6.5 seconds
    }

    const turnOnYellow = () => {
      this.red = false;
      this.yellow = true;
      setTimeout(turnOnGreen, 1000); // Yellow for 1 second
    }

    const turnOnGreen = () => {
      this.yellow = false;
      this.green = true;
      setTimeout(turnOnYellowAgain, 4000); // Green for 4 seconds
    }

    const turnOnYellowAgain = () => {
      this.green = false;
      this.yellow = true;
      setTimeout(() => { this.trafficSignal() }, 1000); // Yellow again for 1 second, then restart
    }

    // Start the traffic signal
    turnOnRed();
  }
This function uses JS concepts like callbacks and setTimeout to set red, yellow and green for 6.5s, 1s and 4s respectively. Here's a brief explanation of each of these concepts:
- callbacks: An asynchronous programming construct where functions take other functions as arguments. These argument functions can then be executed once the parent functions have finished execution, hence the name callback.
- setTimeout: The JavaScript function takes a callback function and a time delay as arguments. It executes the callback function after the specified delay.
setTimeout(function() {
  console.log('This will be executed after 1000 milliseconds.');
}, 1000);
trafficSignal function can then be invoked from within the ngOnInit lifecycle hook which triggers an infinite event cycle resulting in a traffic light like behavior.
ngOnInit() {
    this.trafficSignal();
  }
Here, Angular concepts like lifecycle hook and change detection are used:
- Angular Lifecycle Hooks: Methods that allow tapping into specific moments in the lifecycle of a component or directive, providing a way to perform actions at certain stages of the component's lifecycle, such as initialization, change detection, and destruction.
- Angular Change Detection: Change detection is the process by which Angular checks for changes in the application's data and updates the view accordingly, ensuring data changes in our application are reflected on the UI automatically.
Conclusion
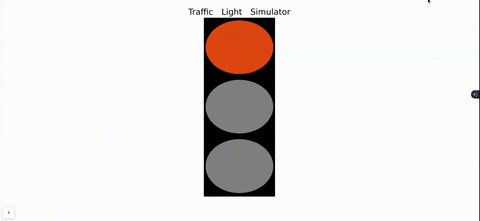
Voila! Our traffic light simulator is now ready.
 Code for this mini project is hosted at my GitHub profile.
You can also build this project and bundle it in a container image ready for deployment using the following Dockerfile:
Code for this mini project is hosted at my GitHub profile.
You can also build this project and bundle it in a container image ready for deployment using the following Dockerfile:
#stage 1
FROM node:latest as node
WORKDIR /app
COPY . .
RUN npm i
RUN npm run build --prod

#stage 2
FROM nginx:alpine
COPY --from=node /app/dist/resume /usr/share/nginx/html
EXPOSE 4200